Creating a secure FTP account on Synology DSM 7.2 for accepting WordPress website backups involves several steps to ensure the security of the data and the server.
Assumptions:
- Solid knowledge of DSM, FTP, SSL/TLS, and Linux
CRITICAL POINT: Ensure you already have 2FA enabled at a minimum!!
Here is a quick guide:
1.0 Enable FTP Service on Synology DSM
1.1 Login to your Synology DSM:
- Open your web browser and log in to the Synology DSM interface.
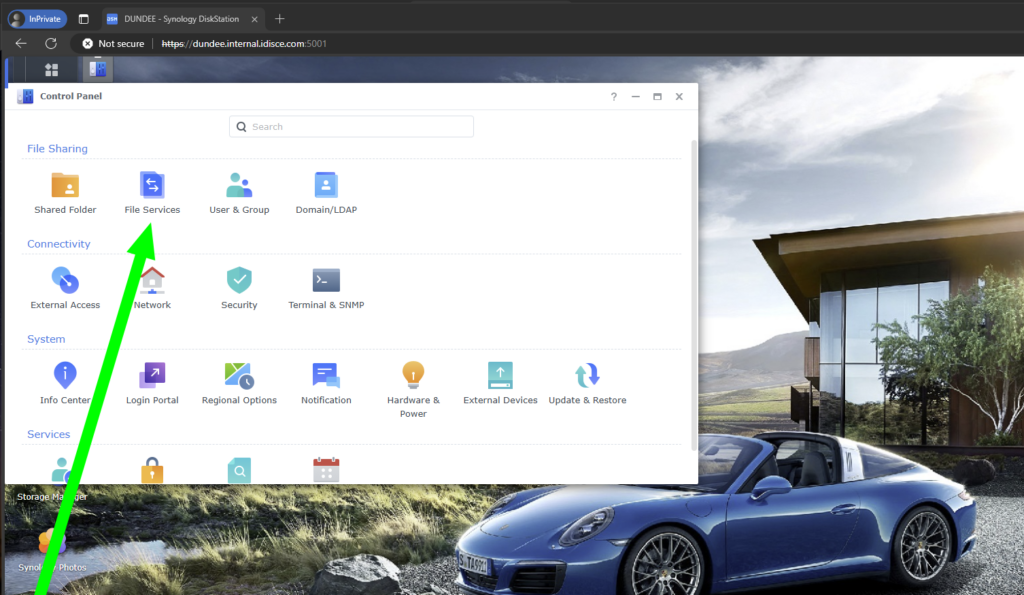
1.2 Go to Synology DSM Control Panel
- Navigate to
Control Panel > File Services.
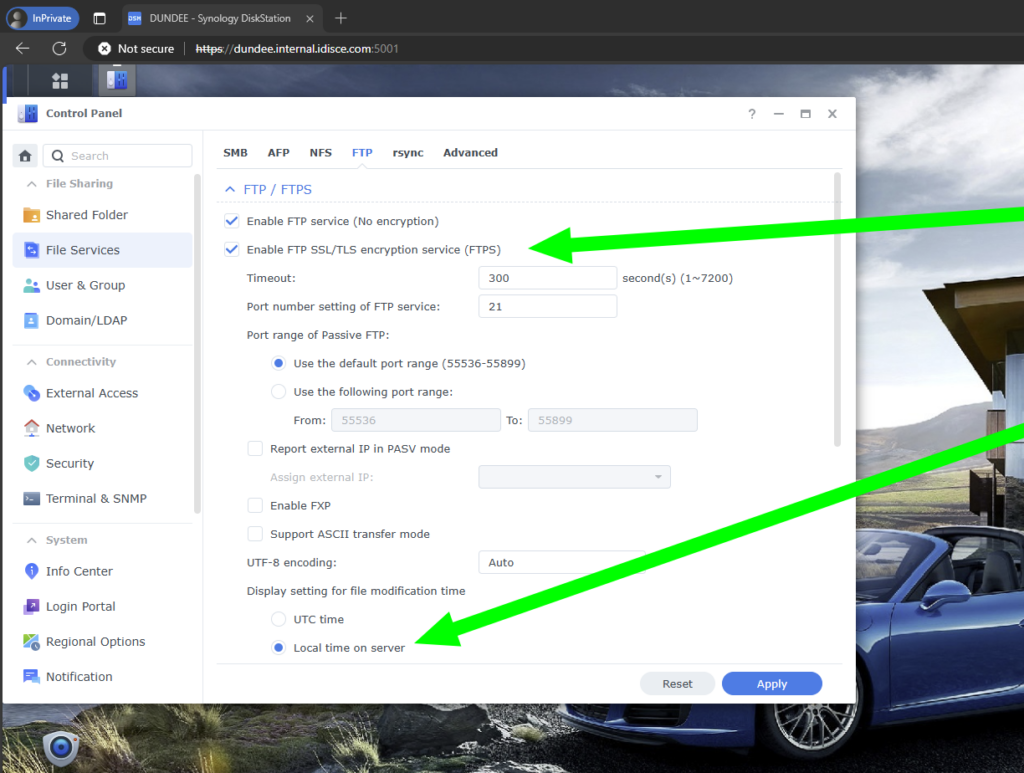
1.3 Enable FTP:
- Under the
FTPtab, check the box forEnable FTP service.
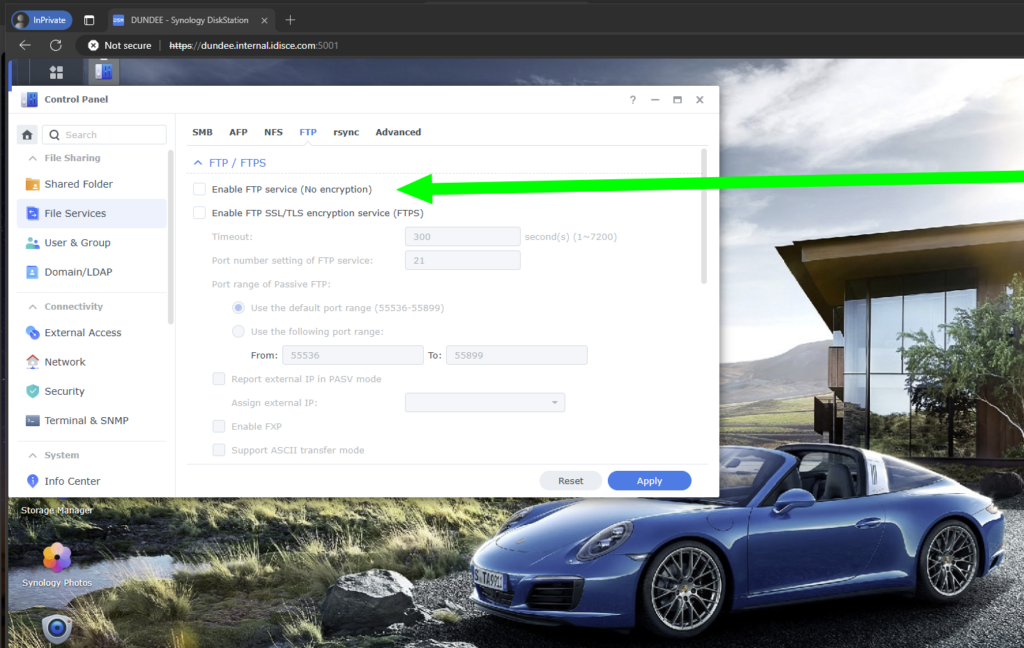
- Configure the port (default is 21) and other settings like passive FTP ports if required.
1.4 Enable FTP over SSL/TLS (FTPS):
- For secure transmission, enable
FTP over TLS/SSL.
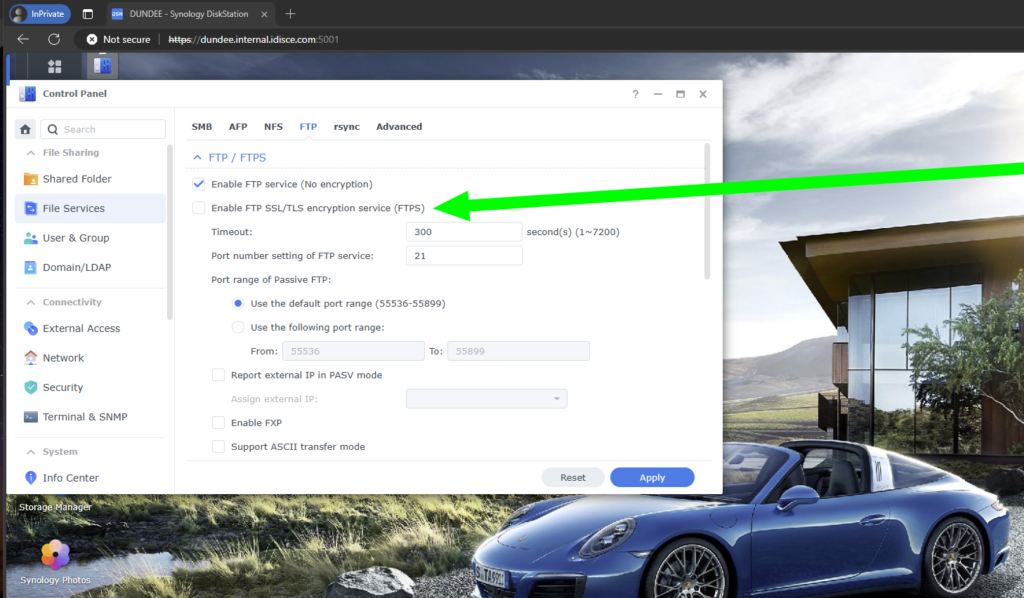
You can create or import an SSL certificate under Control Panel > Security > Certificate.
2.0 Create a Dedicated Backup Group
2.1 Go to Control Panel > Group:
Create a New Group for Dedicated FTP use:
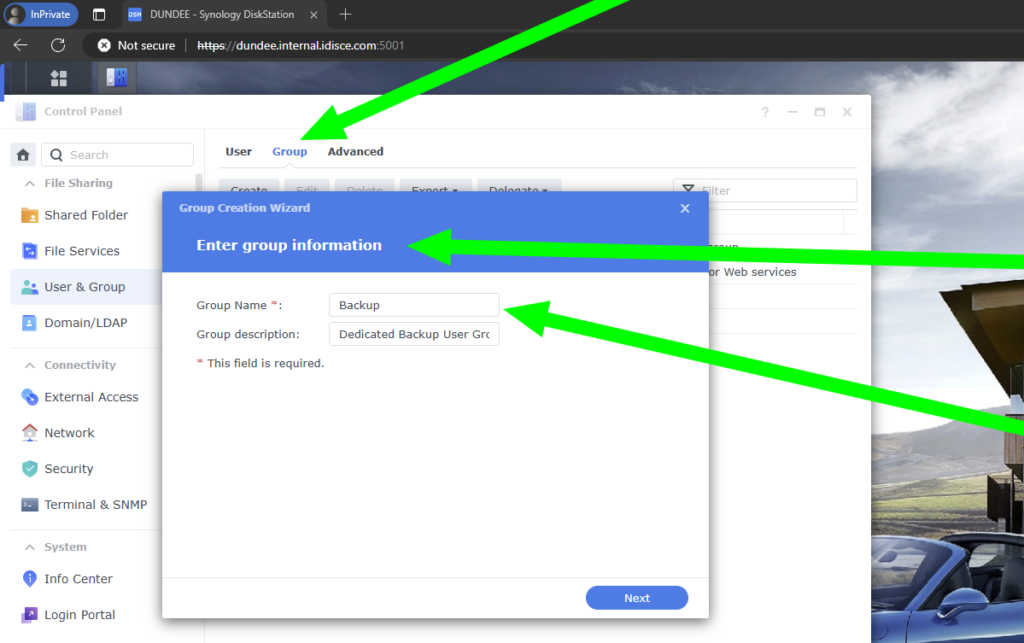
Lock Down the Group Permissions to a dedicated Shared Folder and minimize Read/Write Privileges.
3.1 Go to Control Panel > User:
Create a New User Account for Dedicated FTP use:
- Navigate to
Control Panel > User & Group > User. (security thru obscurity) - Click
Createto start the user creation wizard. - Enter the username and password for the new user. (Minimum 48-128 Random Character Password)
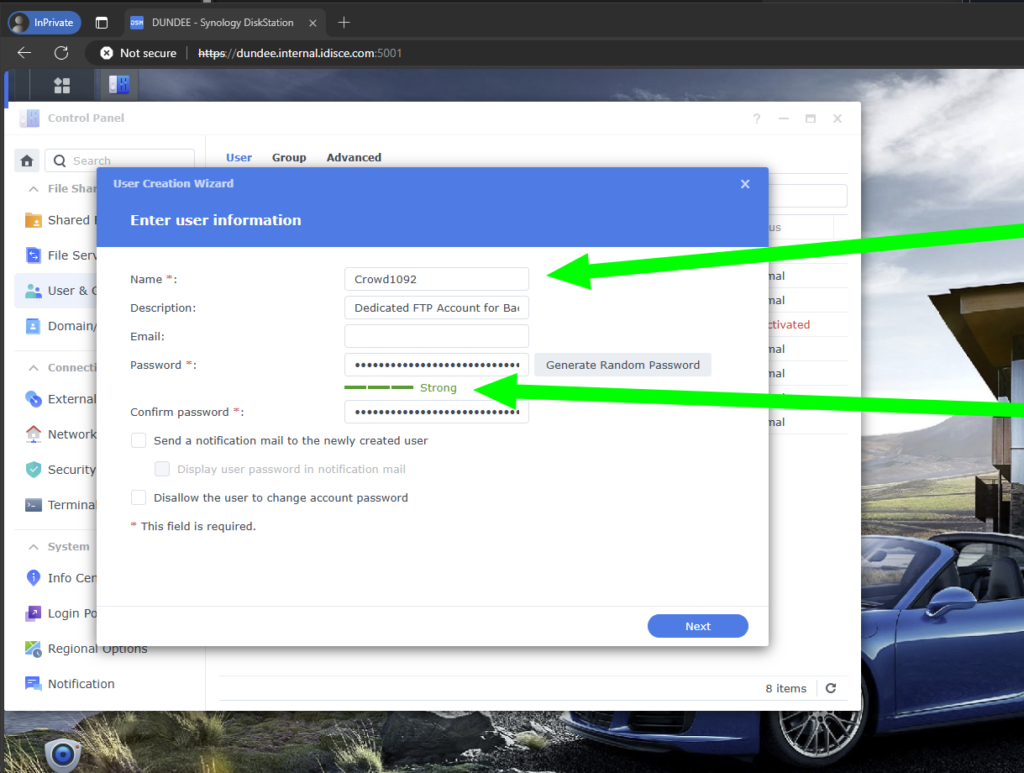
Lock Down the User Permissions as allocated via the dedicated Backups Group to minimize Read/Write Privileges.
Test and Verify your new service!